Flat Lay Photography for Ecommerce: How to Get Professional Results
Flat lay photography is the most effective way to show a complete product story in a single, clean image. By arranging items on a flat surface and shooting from directly overhead, you create a sense of order and intentionality that converts browsers into buyers. While it seems simple, mastering the spacing and alignment takes practice, but the return on investment for your brand identity is massive.
Definition
Flat lay photography is the practice of arranging products on a horizontal surface and capturing them from a top-down, overhead perspective. It is commonly used in ecommerce to display products clearly while maintaining a high level of organization and visual appeal.
Why Flat Lay Works for Modern Brands
Your customers want to see exactly what they are getting without the clutter of a messy environment. Flat lays remove depth of field issues and focus purely on the product, which is why it is essential for photographing clothing for ecommerce where fabric and layout are key. When done well, this style creates a uniform look across your product catalog.
The Psychology of Knolling
Knolling is the art of arranging objects at 90-degree angles on a flat surface. It taps into our human desire for symmetry. It feels satisfying to the eye and gives the impression that your product is high-quality and well-curated. This level of intentionality signals to your customer that your brand pays attention to the details.
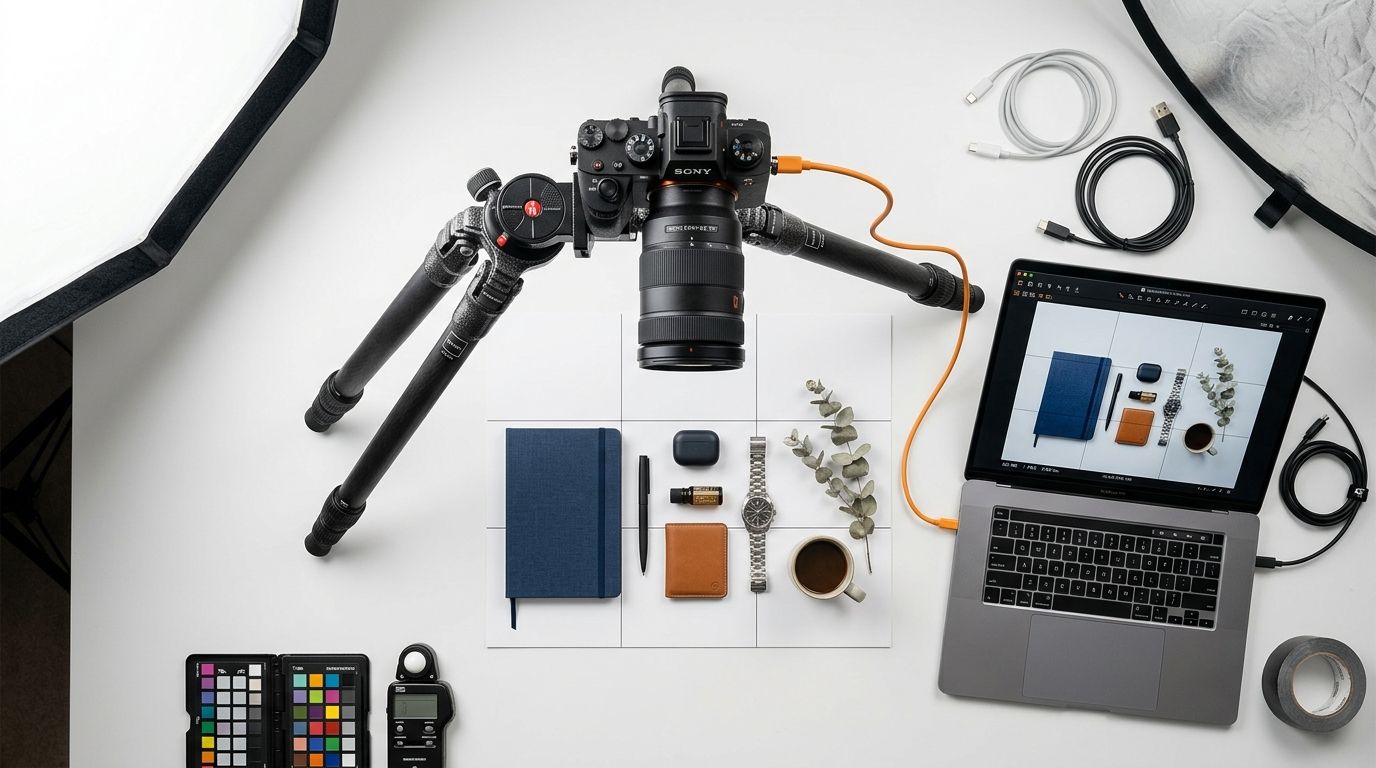
Technical Execution and Setup
You do not need a massive studio to pull this off. A simple table near a large window is usually enough to start. The secret is consistency in your framing. If your camera moves between shots, your grid will look broken on the collection page.
| Requirement | Standard | Pro Tip |
|---|---|---|
| Lighting | Soft natural light | Use a diffuser |
| Background | Flat, neutral | Use matte surfaces |
| Alignment | Perfectly parallel | Use a tripod |
| Editing | Batch adjustment | Consistent color correction |
Getting the right lighting for product photography is more than just turning on a lamp. If you are struggling with inconsistent results, you might be fighting your environment rather than controlling it.
Choosing the Right Backdrops
The surface you choose acts as the canvas for your product. Avoid busy patterns that fight for attention. We have a detailed guide on the best backgrounds for product photos to help you avoid common mistakes like glare or distracting reflections. Sometimes, the simplest white or gray textured board is the only thing you need to make your product pop.
Consistency is key. If you are trying to learn DIY professional product photos, remember that you are building a library of assets. Your images should feel like they belong together, not like a collection of random snapshots from different days.
Frequently Asked Questions
What equipment do I need for flat lay photography?
Start with a stable tripod or a dedicated overhead rig to ensure your camera stays perfectly parallel to the floor. Use a quality prime lens to minimize distortion and capture sharp textures across the entire frame. Good lighting for product photography is the final requirement for a clean result, so aim for soft, diffused light sources that fill shadows without creating harsh highlights on your product surfaces.
What are the best backgrounds for flat lay product photos?
Neutral textures like matte paper, light wood, or concrete work best because they do not distract from your product. You should choose surfaces that complement the color palette of your brand to maintain a consistent aesthetic across your catalog. Investing in professional vinyl backdrops allows for easier cleaning and better durability, which helps you maintain the best backgrounds for product photos over a long period.
How do I keep products from shifting during flat lay shoots?
Use small pieces of double-sided tape or museum putty hidden beneath your items to lock them into place. Gravity can cause fabric or small accessories to migrate during long setup sessions, so secure them before you take the final test shot. This approach prevents time-consuming adjustments and helps you maintain your perfect composition while swapping different products in and out.
When should I use flat lay vs on-model photography?
Flat lay photography serves as the perfect solution for organized catalog shots that highlight product details and material quality. Choose on-model photography when you need to show scale, fit, or the way a fabric moves on a person. Mixing both styles provides a more complete picture for your customers, especially when photographing clothing for ecommerce where fit remains a primary concern for the shopper.
Key Takeaways
- Maintain a strictly overhead, parallel camera angle for all shots.
- Use neutral, matte backgrounds to keep focus on your product.
- Secure small items with adhesive putty to prevent unwanted shifting.
- Combine flat lay assets with on-model imagery for a complete product page.
Streamline your product photography workflow
If manual studio setups are slowing down your launch timeline, you can experiment with AI-driven visual modes to generate consistent catalog imagery in minutes. Test your product against different styles to see what converts best with your specific audience.
Try CherryShot AIThe time you spend perfecting your flat lay composition will pay off in higher engagement across your site. Consistency in your visual language remains the single biggest driver of brand trust.