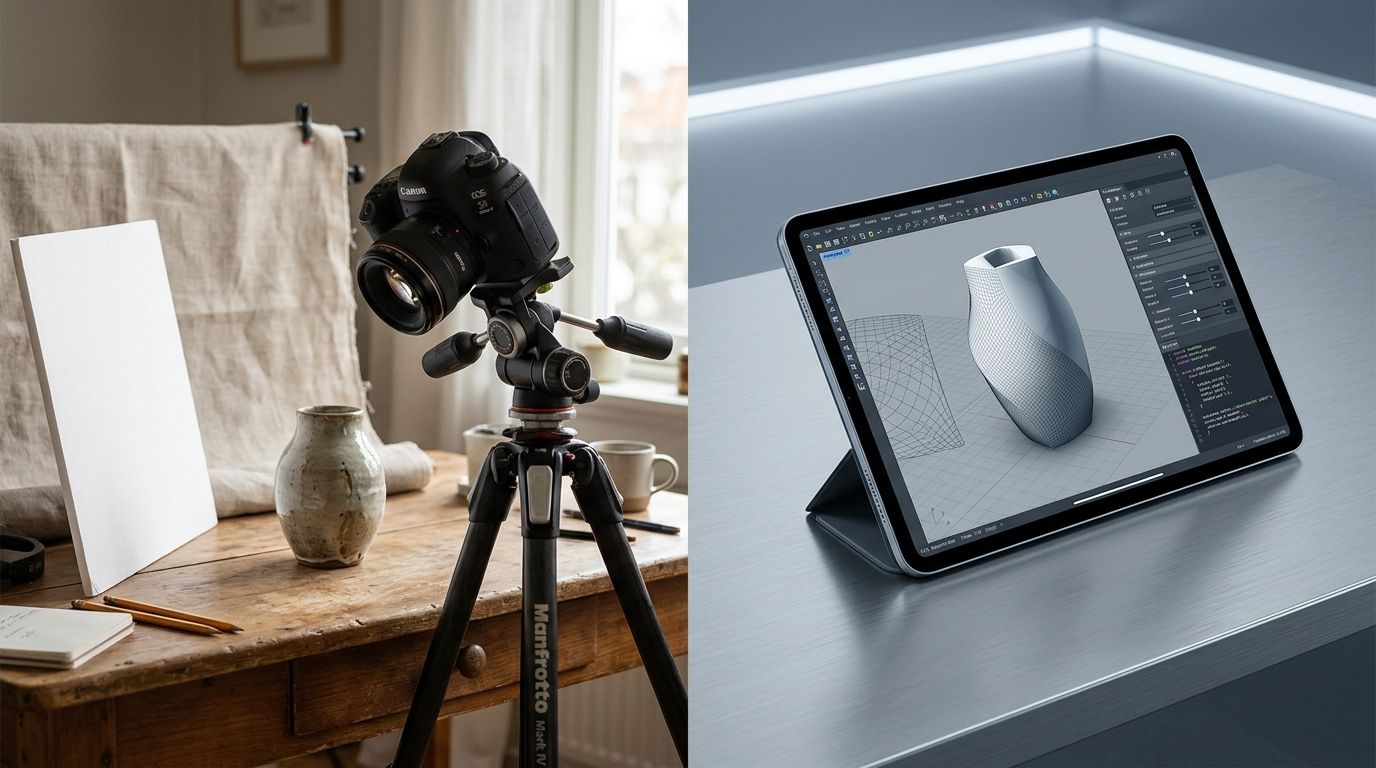
DIY Product Photography Setup vs AI Photography
Can you shoot high-converting product photography at home? Yes. You need a modern smartphone, a white foam board, a window with indirect sunlight, and about four hours to get the lighting right. The real question is whether you should. Most founders start with a DIY product photography setup out of necessity. You save money on photographer day rates but pay for it in time and consistency. Eventually, the bottleneck shifts from budget to speed.
Definition
A DIY product photography setup is a manual process of arranging cameras, lighting, and backgrounds to photograph items for sale without hiring a professional studio. It typically relies on natural window light, smartphones, and inexpensive reflective materials like foam board to capture clear, accurate images for early-stage ecommerce catalogs.
When you launch your first three products, spending a Saturday moving a table closer to a window makes sense. You learn exactly how shadows hit your packaging. You figure out what angles make your labels legible. You build a foundation of visual assets for zero dollars.
Then you hit ten SKUs. Then twenty. You release a new seasonal collection. Suddenly, you realize you cannot remember how far the camera was from the table three months ago. The weather is overcast on the only afternoon you have free to shoot. Your new photos look slightly bluer than your old photos. This is the exact moment affordable product photography stops being affordable.
Building a DIY product photography setup that actually works
If you are going to photograph products at home, ignore the cheap light tents sold online. A small fabric cube with built-in LED strips seems like an easy fix. It is not. Those boxes blast your product with flat, omnidirectional light. They erase the subtle shadows that give objects depth. Your product ends up looking like a floating sticker.
Instead, rely on natural light product photography. It is free and highly controllable once you understand the basic physics.
The window and the bounce card
Find the largest window in your home or office. You want indirect light. If a harsh beam of sunlight is hitting the floor, wait a few hours or move to a different room. Direct sunlight creates hard, black shadows that look unprofessional. Indirect light creates a soft gradient.
Place a table next to the window. Tape a large sweep of white poster board to the wall behind the table and let it drape down onto the surface. This creates a seamless background without a visible corner line.
Place your product on the paper. The side facing the window will be bright. The opposite side will be dark. To fix this, stand a piece of white foam core on the dark side, just out of the camera frame. This white board bounces the window light back onto the shadowed side of the product. By moving the board closer or further away, you control exactly how dark the shadows get.
Choosing your camera equipment
You do not need to buy a mirrorless camera for ecommerce catalog shots. Modern smartphones have lenses capable of capturing crisp, print-quality images if the lighting is adequate. If you want to know exactly what the constraints are, reviewing our guide on iPhone product photography will show you when a phone succeeds and when a real sensor is mandatory.
You absolutely need a tripod. If you hold the phone in your hand, your framing will change slightly with every shot. When customers scroll through your product gallery, the item will appear to jump around the screen. A basic tripod locks the angle in place.
Where product photography at home falls apart
The setup described above works brilliantly for one day of shooting. The problems start the morning you need to photograph a new product line.
The consistency trap
Ecommerce trust relies on visual consistency. If a customer visits your category page and sees twelve products, those images need to match. The background brightness, the camera height, and the shadow direction must be identical.
Replicating your DIY product photography box setup exactly is nearly impossible. The sun will be at a slightly different angle. The clouds might be thicker. You might position the bounce card two inches further to the left. The result is a catalog page that looks messy. Customers unconsciously register this visual friction. They might not be able to articulate why the brand feels cheap, but the trust deficit is real.
The post-production bottleneck
Taking the photo is only twenty percent of the work. The real cost of a product photography setup is buried in post-production. You have to remove dust specks. You have to fix the white balance so the white background actually looks pure white instead of pale yellow. You have to trace the outline of the product to create a clipping path so you can drop the image onto a different background later.
If you value your time at fifty dollars an hour, spending three hours editing ten photos means those "free" DIY photos just cost you fifteen dollars each.
AI product photography vs doing it yourself
There is a clear inflection point in every brand's growth where logistics override scrappiness. You reach a phase where launching a product on time is more important than saving two hundred dollars on visual assets. This is why brands abandon the DIY product photography setup.
If you hire a freelance photographer, you hand over the stress of lighting and consistency. You also accept a two-week turnaround time and a heavy invoice. If you want to see the literal math comparing those options, exploring AI photography costs provides a direct breakdown of where budget is wasted on traditional shoots.
(Worth noting: if you sell highly reflective items like mirrored sunglasses or complex faceted jewelry, a physical shoot with polarizing filters is still superior. AI struggles with true optical reflection physics right now.)
How AI replaces the physical workflow
AI product photography removes the physical environment entirely. You upload a base image of your product. This base image does not need perfect lighting. It just needs to clearly show the shape and details of your item. You select a visual mode inside CherryShot AI, like Minimalist or Lifestyle. The tool analyzes your product, applies simulated studio lighting, and generates professional imagery in minutes.
The consistency problem vanishes. Because the lighting is generated mathematically rather than captured practically, you can generate an image for a new SKU six months later and it will perfectly match your existing catalog. The shadows will fall at the exact same angle. The brightness will be identical.
Scaling without a studio
When you rely on product photography without a studio, your ability to test different visuals is extremely limited. If you shoot a moisturizer on a white background, you cannot easily test how it would convert if it were shot on a marble vanity. Doing so requires setting up a completely new physical shoot, sourcing a piece of marble, and waiting for the right light.
With CherryShot AI, changing the environment takes thirty seconds. You select a different mode or type a custom prompt. You can generate a plain white catalog image for your product page, a lifestyle image for Instagram, and a high-contrast editorial shot for an email campaign, all from the same base upload. The cost drops to less than five dollars per image. The entire post-production bottleneck disappears.
| Feature | DIY Photography Setup | CherryShot AI |
|---|---|---|
| Upfront Cost | $20 - $100 (tripod, foam board) | Starts at $10 |
| Time per SKU | 1 to 2 hours (setup, shoot, edit) | Under 3 minutes |
| Lighting Consistency | Low (depends on weather) | Perfect (mathematically generated) |
| Background Flexibility | Limited to physical props owned | Infinite environmental modes |
| Best For | Launching your first 3 products | Scaling catalog and rapid marketing |
If you want to take great photos yourself, the process requires patience and a willingness to learn manual editing skills. For a brand just starting out, that effort is often worth the education. For a brand trying to move fast, that effort is simply friction.
Frequently Asked Questions
Can I do product photography at home?
You can shoot professional-grade product photos at home using natural window light, a modern smartphone, and a white foam board to bounce shadows. The primary challenge involves maintaining consistent lighting across multiple days when weather conditions inevitably fluctuate. To succeed, place a table near your largest window and use a foam core board on the opposite side to fill dark shadows.
What equipment do I need for DIY product photography?
A basic setup requires a late-model smartphone, a sturdy tripod, a table, and white foam core boards. A tripod ensures identical framing across your entire catalog, preventing items from appearing to jump around the screen when customers scroll through gallery images. Position your table near a window for indirect sunlight and place the white boards opposite the light source to soften harsh shadows.
What is the cheapest way to do product photography?
The cheapest method relies on your existing smartphone paired with indirect natural window light. This approach requires buying inexpensive white poster board to serve as a seamless background and a secondary foam core board for bouncing light. Tape the paper to a wall behind a table near a bright window, letting it drape smoothly across the surface to eliminate distracting corner lines in your final images.
Does DIY product photography work for ecommerce?
DIY photography handles your initial product launches because early customers prioritize clear visual information over high-budget art direction. This manual system breaks down as your catalog grows, forcing you to spend excessive hours matching inconsistent lighting across fifty different product listings. Switch to automated platforms or professional studios when post-production delays begin preventing you from launching new collections on schedule.
Is AI product photography better than DIY?
AI product photography provides superior speed, scale, and visual consistency compared to manual home setups. While a physical shoot demands manual staging and hours of detailed photo editing, artificial intelligence generates dozens of campaign-ready environments from a single flat image upload. Use AI platforms to instantly place your products in diverse lifestyle settings without buying props or waiting for optimal weather conditions.
Key Takeaways
- Natural window light and a foam board bounce card beat cheap LED light boxes every time.
- The true cost of a DIY setup is the time spent on post-production and color correction.
- Maintaining visual consistency across SKUs shot on different days is the hardest part of home photography.
- Replacing physical shoots with AI generation eliminates weather dependencies and dramatically speeds up product launches.
Doing things manually is a rite of passage for every successful brand. You learn the mechanics of your business by touching every part of it. But eventually, growth requires trading manual effort for leverage. When you are tired of waiting for the sun to hit your living room window at the right angle, CherryShot AI is ready.
Audit your product imagery against an automated studio baseline
Upload one of your current DIY product photos to see how mathematically generated lighting compares to your physical window setup. You can test different background environments in minutes to see what converts best for your next campaign.
Try CherryShot AI