DIY Product Photography: When It Makes Sense and When It Stops Working
DIY product photography is a practical starting point for any new brand, but it creates a dangerous bottleneck as you grow. If you have five products and a shoestring budget, taking photos on your kitchen table is the right move. Once you reach twenty SKUs or need seasonal campaign updates, that same approach shifts from being a money-saver to a major operational anchor. You eventually reach a scale where the labor cost of DIY photography exceeds the price of professional or automated solutions.
Definition
DIY product photography is the practice of producing your own visual assets without external agencies or professional studios. It relies on internal resources, personal equipment, and individual labor to generate store imagery.
The Reality of the Home Studio Setup
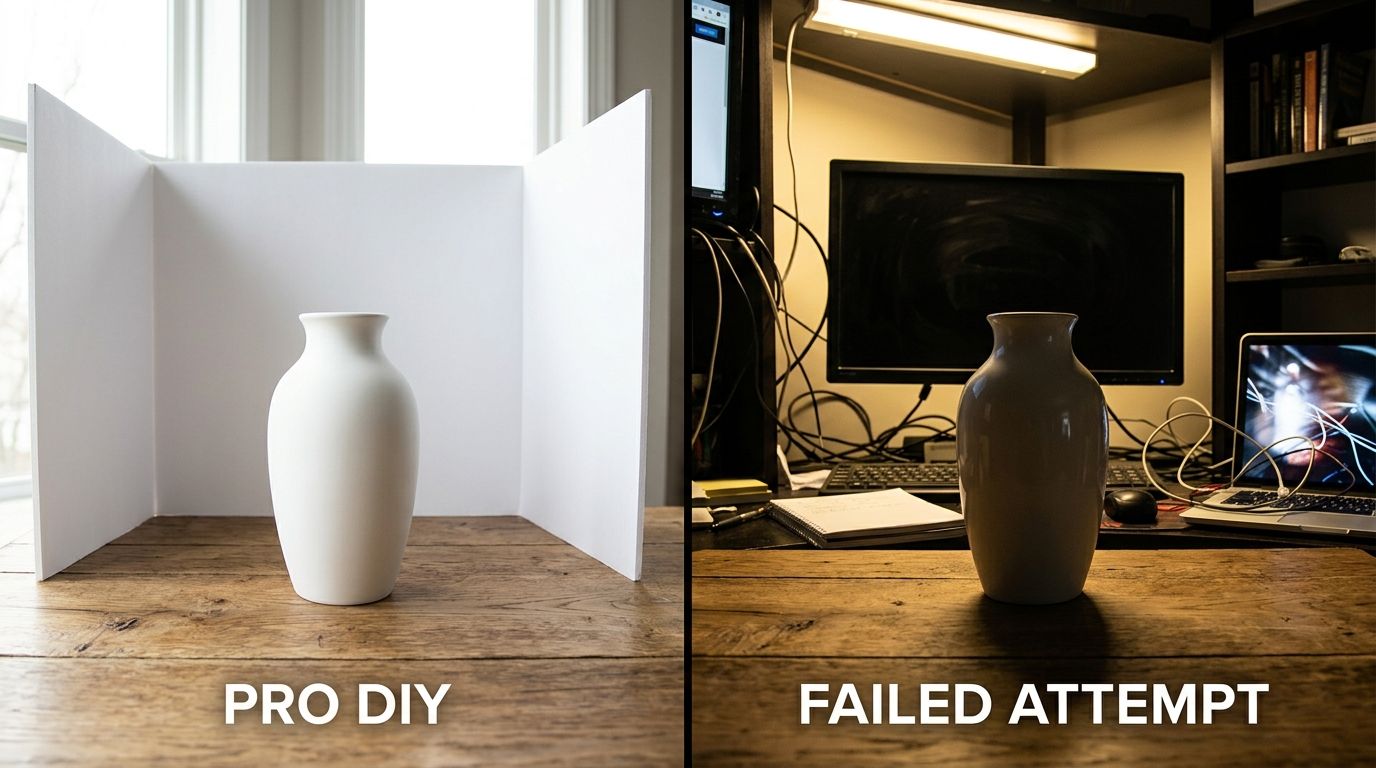
Most founders start with a basic lighting kit and a white backdrop. You can certainly take good product photos without a professional if your brand aesthetic is minimal and clean. However, a manual setup requires deep technical knowledge that has little to do with selling products. You end up spending your time adjusting light diffusion or fixing white balance rather than crafting your marketing copy.
Where Manual Photography Breaks Down
The biggest issue with the home studio approach is inconsistency. When you take photos on different days, the light, the camera angle, and the post-production processing will naturally drift. Your product pages begin to look disjointed, which can undermine buyer confidence. Even mastering product photography with an iPhone requires a level of discipline that most teams cannot maintain while simultaneously trying to manage inventory and fulfillment.
| Production Type | Best For | Primary Cost |
|---|---|---|
| DIY Setup | Early-stage, low SKU count | Founder's Time |
| Traditional Studio | Hero imagery, campaign sets | Cash and Scheduling |
| AI Production | Catalog updates, rapid testing | Subscription or Per-image |
The Hidden Costs of Scaling Manually
When you ignore the labor hours and focus only on the cost of gear, you miss the true expense of the DIY model. Every hour spent moving lights is an hour you are not driving traffic or improving your checkout experience. We often discuss the hidden costs of bad product photography, yet we rarely talk about the cost of the internal time spent trying to make mediocre photos look acceptable. If you spend three days photographing a new collection, you have effectively paid for that shoot with your own salary.
Moving Past the DIY Phase
When the manual process no longer keeps up with your product launch calendar, you need a different strategy. Some brands transition to booking professional studio days, but this introduces its own logistical nightmares. Others look for automated tools that remove the manual dependency entirely. Understanding when AI product photography makes sense for your specific needs is a move toward long-term operational efficiency.
At the end of the day, your customers care about the product, not how it was photographed. They want to see features clearly and understand how the item fits into their lives. If your current DIY approach prevents you from launching new colorways or testing new product angles, it is time to move on.
Frequently Asked Questions
How good can DIY product photos realistically get?
DIY photos can reach a professional standard if your product is simple and you have a solid grasp of lighting basics. You need a clean background, natural light, and a tripod to eliminate camera shake. However, the consistency across a large catalog often drops as you move from one batch to the next. Perfectionism usually hits a wall when you try to replicate complex lighting setups or specific brand aesthetics.
What is the time cost of DIY product photography per product?
A standard DIY session typically consumes about forty-five minutes per product when accounting for setup, shooting, and post-production. You must clean the product, arrange the props, fiddle with light diffusion, and spend time editing in software later. This time cost scales linearly, meaning fifty products will require roughly thirty-seven hours of labor. Most founders eventually find that this time is better spent on growth initiatives rather than photography tasks.
What SKU count is the tipping point where DIY stops being practical?
The tipping point usually arrives when you hit ten to fifteen SKUs per quarter. At this volume, the recurring effort required to keep your imagery consistent across your store becomes a massive distraction from operations. Managing a spreadsheet of assets and ensuring every product looks like it belongs to the same brand is challenging. Once your inventory reaches this scale, you need a scalable production system rather than a manual one.
What does DIY product photography miss that professional options provide?
DIY setups lack the gear versatility and specialized talent needed for high-end campaign imagery. Professionals bring light shaping tools, high-end lenses, and color grading expertise that turn a simple item into a desirable object. You miss out on the collaborative art direction that builds a strong visual identity. Relying only on DIY means your brand identity remains static and often feels less authoritative than your larger competitors.
Key Takeaways
- DIY photography works for initial product launches but fails at scale.
- The true cost of DIY is the founder time diverted from core growth tasks.
- Consistency across a growing catalog is nearly impossible to maintain manually.
- Once you reach fifteen SKUs, prioritize efficiency over manual production methods.
Streamline your product imagery production today
Stop spending your weekends in a DIY setup. Generate high-quality campaign imagery in minutes by uploading your product base and selecting a visual mode that matches your brand.
Try CherryShot AITransitioning away from manual photography is the best way to regain control over your brand's visual identity. Whether you choose a professional studio or CherryShot AI, the result should always be a cleaner and more consistent store experience.