Natural Light Product Photography: When It Works and When You Need Artificial Light
Natural light product photography is the most accessible entry point for new ecommerce brands. You do not need expensive gear, complex wiring, or a dedicated studio space to capture clean images of your products. If you have a window and a flat surface, you have a production setup. However, the reliance on daylight introduces significant unpredictability into your operations. (It is worth noting that while natural light looks authentic, it is notoriously difficult to replicate across five hundred different product SKUs.)
Definition
Natural light product photography uses daylight entering through a window or open door to illuminate subjects rather than professional studio strobes or continuous LED lights. This approach relies on the position of the sun and environmental conditions to determine the mood and exposure of the final image.
Why Brands Choose Window Light
Most early-stage founders start with window light because the cost of entry is essentially zero. When you are launching a brand, every dollar counts, and DIY product photography provides a way to get product images online without waiting for a production house. It offers a soft, pleasant quality that feels grounded and honest to modern consumers. When the goal is an aspirational lifestyle shot, window light often delivers a result that feels more relatable than a sterile, perfectly lit studio image.
The Reality of Consistency
Consistency remains the biggest hurdle for growing brands. Natural light changes based on the time of day, the cloud cover, and the season. If you shoot half of your inventory on a sunny Tuesday morning and the other half on a rainy Thursday afternoon, your store will look disjointed. This is where the limits of DIY photography become clear. Customers notice when the color profile of your product shifts from one page to the next.
Comparing Your Lighting Options
Understanding which path to choose depends on your volume and brand requirements. If you have ten products, natural light is a manageable project. If you have one hundred, it is a business risk.
| Feature | Natural Light | Artificial Light |
|---|---|---|
| Cost | Low (Free) | High (Equipment) |
| Consistency | Variable | High |
| Setup Speed | Moderate | Slow |
| Flexibility | Limited to daylight | 24/7 |
When to Move to Professional Lighting
As you scale, you will likely find that your artificial lighting setup becomes a necessity rather than an expense. Professional gear allows you to lock in your settings once and repeat them for every SKU. You stop fighting the weather and start focusing on the output volume.
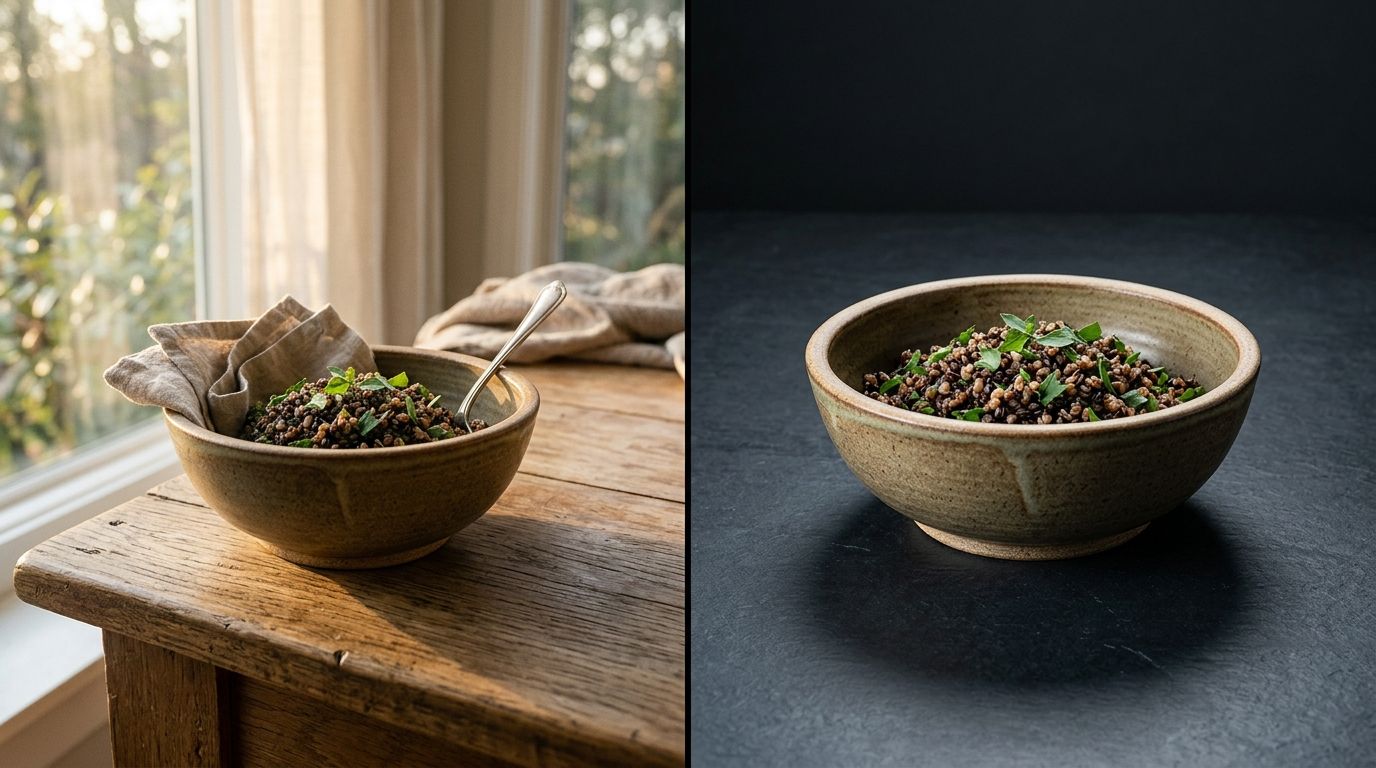
If you prefer the aesthetic of natural light but cannot deal with the production headaches, you have other options. Modern tools allow you to generate high-fidelity, campaign-ready imagery that mimics the look of natural light while maintaining perfect consistency. CherryShot AI provides a way to get those soft, sun-drenched shots for your product catalog without ever holding a camera. You upload your file, select a mode like Lifestyle or Minimalist, and get images that match your existing assets instantly.
Frequently Asked Questions
Is natural light good for product photography?
Natural light is excellent for soft, organic imagery and lifestyle shots that need a human touch. It creates gentle shadows and highlights that feel authentic to customers browsing social feeds. However, this light source changes constantly throughout the day, which makes color matching across your entire product catalog a logistical headache.
What time of day is best for natural light product photography?
Early morning or late afternoon provides the softest, most flattering light for most products. Direct midday sun creates harsh, high-contrast shadows that usually distract from your product details and require heavy post-production cleanup. If you must shoot during peak hours, position your setup near a north-facing window to avoid direct sun beams.
How do you diffuse natural light for product photos?
Place a thin white curtain or a translucent diffusion sheet between your product and the window. This action softens the light source by scattering the rays, which removes unwanted hard edges on your subject. You can also use a white foam board to bounce light back into the shadows for a more balanced look.
When should you use artificial light instead of natural light for product photography?
Switch to artificial lighting when your brand requires absolute consistency across every single SKU. If you are shooting a product line where colors must be perfectly accurate, controlled studio gear eliminates the variability of the sun. Professional teams rely on artificial light to meet strict production schedules regardless of the weather outside.
Key Takeaways
- Natural light is cost-effective but introduces significant variance in image quality.
- Consistency is the primary reason brands eventually transition to artificial setups.
- Diffusion is essential to prevent harsh shadows when working with window light.
- CherryShot AI bridges the gap between natural aesthetics and production-grade consistency.
Streamline your product imagery production today
If you are tired of chasing the sun or managing complex lighting gear, try a more efficient workflow. Upload your product photos to CherryShot AI to see how quickly you can generate consistent, studio-quality shots for your catalog.
Try CherryShot AIThe right choice comes down to whether your current bottlenecks are financial or operational. Once you have identified your needs, you can decide if the soft glow of a window is worth the time it takes to manage the light.