How to Photograph Glass Products for Ecommerce
Photographing glass products for ecommerce is a technical headache that stops most small brands from scaling their catalog. Because glass is transparent and highly reflective, it essentially acts like a mirror that shows the messy state of your studio. You are not photographing the object itself, but rather how it interacts with the light around it. If you get the physics wrong, your product looks like a blurry smudge.
Definition
Transparent product photography is the process of capturing items like glass, acrylic, or clear liquids. It relies on manipulating light reflections to outline the product's shape rather than direct illumination which often causes blown-out highlights.
Why Transparent Objects Are Hard to Shoot
Most beginners try to treat a glass bottle like a pair of cotton sneakers. They set up bright lights, snap a photo, and end up with a glaring white mess where the product should be. When you point a light directly at glass, it bounces back into the lens, creating blinding hotspots that hide the design of the product.
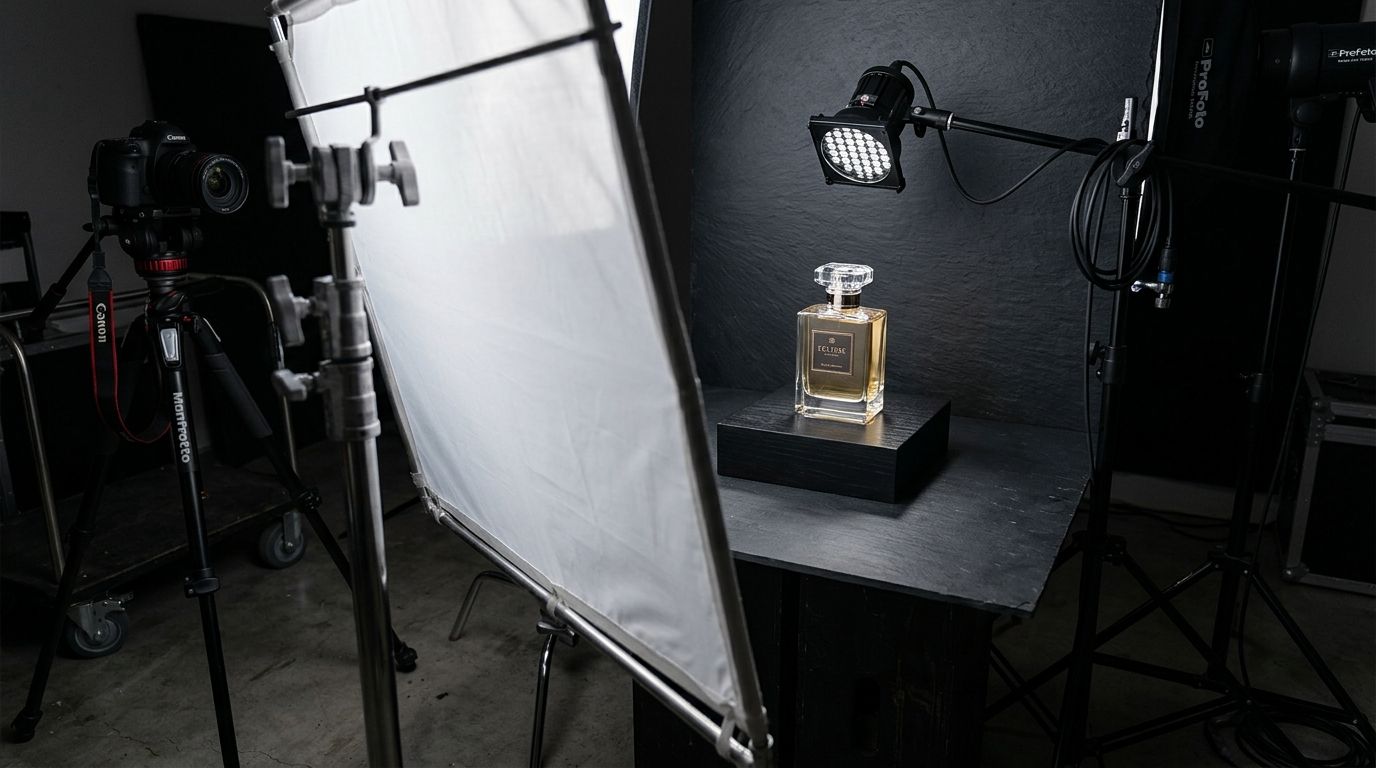
The secret is managing the environment. You have to think about what is reflected on the surface of the glass because that is what the customer actually sees. A cluttered studio or a visible camera body will be captured in the glass. This is why many brands move toward a more controlled essential photography setup that uses flags and diffusers to keep reflections predictable.
Techniques to Control Reflections
You cannot eliminate reflections, so you must learn to control them. Professional studios use black and white cards to draw lines on the edges of the glass. By placing these cards strategically, you create a defined contour that helps the human eye trace the shape of the item.
The Backlighting Method
Backlighting is your best friend when dealing with transparency. Instead of lighting the front of the product, place your light source behind a diffusion screen and shoot through it. This makes the glass pop against the background and turns the liquid inside into a vibrant, glowing element. It is far more effective than trying to manage bounce cards from every angle.
| Technique | Best For | Complexity |
|---|---|---|
| Backlighting | Glass bottles and clear liquids | Moderate |
| Side Flagging | Defining edges and contours | High |
| Top Diffusion | Avoiding harsh highlights | Low |
| AI Synthesis | Batch volume and consistency | Very Low |
Should You DIY or Use AI?
Manual photography is worth the effort if you have one iconic product that requires high-end editorial shots. If you are a D2C brand launching ten new colorways of a glass tumbler every quarter, manual production is a liability. It creates a massive bottleneck where the bottleneck is not your creativity, but the speed of your equipment setup and editing product photos.
CherryShot AI handles this process by interpreting the light profile of your product without the physical labor of setting up three softboxes and a reflector screen. You get the same, consistent result every time. The goal is to spend less time worrying about physics and more time focused on your conversion rates.
Frequently Asked Questions
How do I avoid reflections when photographing glass products?
Control your environment by using black foam boards on the sides of your product to create clean edges. These boards absorb stray light and define the silhouette of the glass against a bright background. Adjusting the angle of your light source is also critical to move distracting white spots away from the center of your item.
What lighting setup works best for transparent products?
Backlighting is the secret to success because it illuminates the object from behind to emphasize its transparency. You should pair this with soft diffused light to avoid harsh glare on curved surfaces. Using a proper lighting setup prevents the ugly hotspots that often ruin professional-looking catalog imagery.
What background colour shows glass products most clearly?
Neutral gray or solid black backgrounds work best to make transparent objects stand out visually. White backgrounds often wash out the details of clear glass, making it look invisible on a screen. Choosing high-contrast product photography backgrounds helps customers identify the shape and volume of your merchandise.
How do AI tools handle transparent and reflective products?
Modern AI tools interpret the geometry of your product while simulating complex light interactions that are usually difficult to capture manually. These systems maintain the core structural integrity of the item while generating realistic surroundings and shadows. Using these tools for volume production allows teams to focus on brand aesthetic rather than tedious technical fixes.
Key Takeaways
- Backlighting provides the best silhouette for transparent objects.
- Black foam boards help control reflection edges and contrast.
- High-contrast backgrounds are better than white for showing glass texture.
- AI-powered tools reduce the time spent on manual light manipulation.
Streamline your product imagery production
If you are tired of spending hours managing studio reflections, try uploading your product to CherryShot AI. It automates the technical heavy lifting while giving you the flexibility to experiment with different visual modes.
Try CherryShot AIPerfecting glass product photography is a marathon, not a sprint. Once you nail the balance of light and reflection, your catalog will feel significantly more professional to the end customer.