Tabletop Photography: The Complete Setup Guide for Small Product Ecommerce
Most guides treat tabletop product photography like a miniaturized version of a Hollywood set. They tell you to buy four strobe lights, an expensive aluminum shooting table, and a dedicated tethering station. If you are running an Etsy shop out of a spare bedroom or managing a beauty brand from a shared office, that advice is useless. A functional table top photography setup only requires three feet of horizontal space and absolute control over your light.
Definition
Tabletop photography is the practice of capturing product images on a raised, static surface within a confined workspace. It relies on controlled lighting and fixed camera positioning to produce consistent product views for ecommerce listings.
You do not need a commercial studio to shoot small products. You just need a rigid surface, a continuous backdrop, and the discipline to stop relying on overhead room lighting. The goal is to build an environment that guarantees visual consistency across your entire catalog without permanently sacrificing half of your living space.
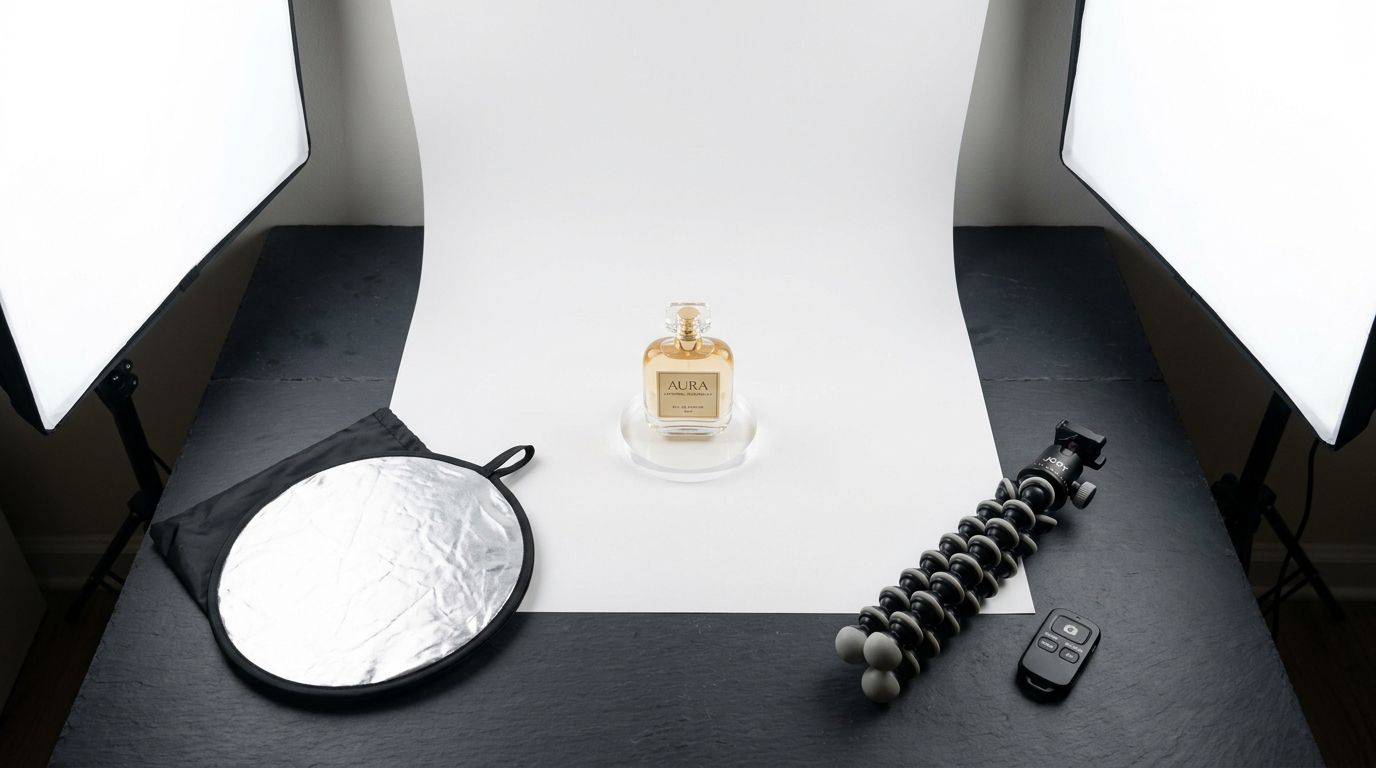
A standard tabletop rig requires less than four square feet of dedicated space. Control the light, bend the backdrop, and stabilize the camera.
Creating a setup that delivers consistent, high-converting images requires understanding how camera optics and light behave in small spaces. We are going to build this rig layer by layer.
Building the physical tabletop foundation
The biggest mistake brand owners make is building their tabletop setup on a wobbly surface. If your table shifts when you bump it with your hip, your framing changes. If your framing changes between shots, your product catalog will look jagged and amateurish when customers scroll through your store.
Choosing the right table height
A standard dining desk sits roughly 30 inches off the floor. This is a terrible height for small product photography. To frame a bottle of serum or a stack of handmade soaps properly, your camera needs to be level with the product. If you use a dining table, you will spend your entire afternoon bending forward at an unnatural angle.
You need a product shooting table that sits at standard kitchen counter height, usually between 36 and 40 inches tall. A standing desk is perfect. A kitchen island works perfectly. If you only have a folding table, place bed risers under the legs. You want to look directly into the camera viewfinder while standing comfortably.
Installing the seamless sweep tabletop
A bare desk reveals a hard edge where the table meets the wall. This horizon line is deeply distracting. To fix this, you must build a seamless sweep tabletop.
| Surface Type | Stability | Portability |
|---|---|---|
| Standing Desk | High | Low |
| Folding Table | Low | High |
| Kitchen Island | Very High | None |
A sweep is simply a piece of flexible material that transitions from a horizontal surface to a vertical surface without folding. Buy a roll of heavy photography paper or a thin sheet of matte vinyl. Tape the top edge to the wall two feet above your table. Let the material curve naturally down onto the table surface. Pull it toward you and tape the front edge under the lip of the desk.
When you place your product on the flat section of the sweep, the background gently curves upward behind it. The camera cannot detect a corner. The product simply floats in an infinite void. This single trick is the dividing line between amateur snapshots and professional catalog imagery.
Lighting a desktop photography setup
A tabletop lighting rig does not need to be expensive, but it must be intentional. When you shoot in a three-foot space, every light source fights for dominance. You cannot leave your ceiling lights on while using a flash. Mixing different color temperatures will cast ugly yellow and blue shadows across your product packaging.
The two-light continuous strategy
Start by turning off every overhead light in the room and pulling the blinds down. You want a dark room so you can control exactly where the light falls.
For a small space product photography rig, continuous LED lights are significantly easier to manage than strobe flashes. What you see is exactly what the camera captures. Place your primary light, called the key light, at a 45-degree angle to the front-left of your product. This illuminates the front label and creates a soft shadow to the right. If you want to learn more about balancing these angles, reviewing a proper ecommerce lighting setup will help you manipulate those shadows intentionally.
Next, place a large piece of white foam board just outside the camera frame on the right side. This acts as a bounce. It catches the light from your primary LED and reflects it back into the dark side of the product, softening the shadow without requiring a second expensive light bulb.
Managing reflections and glare
Tabletop photography has strict limits when you start shooting highly reflective surfaces like chrome jewelry or glossy glass bottles. If you place a bright light two feet from a glossy bottle, the bottle will reflect the shape of the light bulb perfectly.
You must place a diffusion panel between the light and the product. A softbox does this automatically. If you are using bare bulbs, hang a white bedsheet just outside the frame to scatter the light before it hits the product.
Camera distance and spatial limits
The space between your lens and the product dictates the final shape of the item in the photograph. You cannot just shove the camera as close as possible to fill the frame.
Avoiding lens distortion
Wide-angle lenses distort geometry. If you place a 24mm lens just six inches away from a square box, the front panel of the box will bow outward. The back edges will taper aggressively toward infinity. The product will look swollen. If you regularly shoot with your phone, you are constantly fighting this exact wide-angle distortion.
To capture accurate product proportions on a tabletop, you need to pull the camera back. Set your tripod roughly three feet away from the product. Use a 50mm or 85mm lens, or use the 3x optical zoom on your modern smartphone. Standing further back and zooming in compresses the image. The parallel lines on your product packaging will remain straight and mathematically accurate.
Securing the tripod footprint
Your tripod legs will inevitably kick the legs of your table. In a tight space, this is a daily frustration. To prevent this, place two legs of the tripod flat against the front edge of the table, and extend the third leg straight back toward your body. This allows you to stand comfortably without kicking the metal supports every time you reach forward to adjust a product.
The logistics of shooting at volume
Building a pristine tabletop environment is satisfying. Running a hundred products through it is exhausting. Once you set up the lights, tape down the sweep, secure the tripod, and dial in the camera settings, you still have to physically unpack, style, shoot, and repack every single SKU.
Replacing the physical rig
A dedicated table setup still requires manual styling and consistent environmental control. If you share your workspace with pets or children, leaving a delicate paper sweep assembled overnight is rarely an option.
Brands with massive catalogs eventually realize that tabletop logistics throttle their launch schedule. When you need a quick lifestyle shot or a clean catalog image for a new colorway, spending forty-five minutes assembling a desk rig does not make sense. When you evaluate the time spent styling against the cost of your own labor, DIY product photography quickly loses its financial appeal.
This is exactly why high-volume brands move their catalog work to CherryShot AI. Instead of taping paper to a wall, you upload a single reference image of your product. You select a visual mode, such as Classic for clean white backgrounds or Minimalist for subtle environmental shadows. CherryShot AI maps the lighting, generates the scene, and delivers campaign-ready imagery in minutes.
The physical footprint drops to zero. The per-image cost drops from an agonizing manual labor calculation down to less than five dollars. Tabletop photography demands absolute control over your physical environment. AI photography simply demands a good reference image. For small brands operating out of limited square footage, eliminating the physical rig entirely is often the smartest operational move you can make.
Audit your product images before your next campaign
Review your current catalog against the standards discussed here. If you find your lighting inconsistent or your background cluttered, try a test render to see how a standardized virtual environment improves your presentation.
Try CherryShot AIFrequently Asked Questions
What table height is best for product photography?
A table height between 36 and 40 inches is optimal for tabletop product photography. This height matches standard kitchen counters which keeps your workspace comfortable. Standing at this height prevents lower back pain during long production days by aligning your camera with eye level. If you attempt to shoot on a 30-inch dining table, you will inevitably end up hunched over your camera for the duration of the shoot.
How do I create a seamless background on a table?
You need a flexible material that curves gently from the flat surface up to a vertical wall. Secure the top edge of a heavy paper roll or matte vinyl sheet to the wall above your desk. Let the material drape naturally onto the table and tape the front edge underneath. This curved transition hides the horizon line completely from your camera lens, resulting in a perfectly clean, infinite background for your product imagery.
How far away should my camera be for tabletop photography?
Place your camera between two and four feet away from the product, depending on your lens selection. Positioning the camera closer than two feet often causes wide-angle distortion that stretches your product's proportions. Moving the camera back to three feet and using a slight zoom compresses the image field. This distance helps maintain the physical accuracy of the product shape, which is essential for building customer trust in your online store.
What lighting works for a small tabletop setup?
Two continuous LED panels with softboxes provide the most reliable results for desktop setups. Position the key light at a 45-degree angle to the front-left of your product to establish shape. Place a white foam board on the opposite side to fill in shadows and maintain detail. Turning off all ambient overhead room lights ensures that your color temperature stays consistent across your entire catalog, preventing messy mixed light issues.
Can I do tabletop photography with just natural light?
Yes, natural light works if you prioritize working near a large north-facing window. This orientation provides steady, indirect light that avoids the harsh shifts of direct sun. While effective, this method is difficult to maintain because clouds or time changes will alter your white balance and exposure settings. You must be prepared to shoot rapidly and perform heavy color correction if you choose to rely solely on natural light for your ecommerce catalog.
A well-built tabletop studio provides a reliable baseline for your ecommerce imagery. When you outgrow the physical limitations of that space, you do not need to rent a warehouse. You just need to upgrade your tools. Head over to CherryShot AI to see how fast scaling your catalog can actually be.