Camera Settings for Product Photography: ISO, Aperture, and Shutter Speed Explained
Set your ISO to 100, your aperture to f/8, and lock your camera onto a heavy tripod. That simple formula resolves ninety percent of your camera settings for product photography. Most tutorials overcomplicate this. They try to teach you the exposure triangle as if you are trying to capture moving wildlife in a dark forest. You are not. You are photographing a stationary bottle of skincare in a highly controlled environment.
Definition
Camera settings in product photography refer to the specific configuration of the sensor sensitivity, lens aperture, and shutter timing used to capture a still object. These variables determine the focus, exposure, and color accuracy of images meant for commercial display.
Mastering manual mode product photography is just data entry once you understand the baseline variables. Your camera only has three ways to control light. When you shoot in an automatic mode, the camera guesses which settings matter most. A camera is a computer that assumes you are shooting a human face in average daylight. When you put a reflective glass bottle on a pure white table, the computer panics. The resulting image is usually dark, gray, and out of focus.
Taking control of those settings is the only way to get sharp, professional results that look like they belong on a high-end ecommerce site.
Worth noting, dialing in the mathematically perfect camera settings will not save a badly lit scene. You must have adequate light hitting your product before the camera sensor can do its job properly. A poorly lit product shot at the perfect f-stop will still look like amateur hour.
The Exposure Triangle Product Photography Edition
To get the right product photography settings, you need to understand how the three pillars of exposure relate to shooting still life. Forget everything you know about portraits and landscapes. Product photography demands a very specific set of priorities.
ISO for product photography
Your ISO determines how sensitive the camera sensor is to light. In product photography, this is the easiest setting to memorize. Keep it at 100. Always.
Raising your ISO to 800 or 1600 allows you to shoot in darker environments, but it introduces a massive penalty. High ISO numbers create digital noise. This looks like ugly, colorful grain scattered across the dark areas of your image. When a customer zooms in on your product image to read the label ingredients or check the texture of the fabric, that digital noise makes the image look cheap. By locking your ISO at 100 or 200, you guarantee the absolute highest image quality your camera can produce.
Aperture product photography rules
Aperture is the physical opening in your lens that lets light through. It is measured in f-stops. This is the single most important setting for ecommerce work because it controls your depth of field.
Depth of field dictates how much of the image is perfectly sharp from front to back. A low number like f/2.8 means the opening is wide. This lets in a ton of light and creates a blurry, cinematic background. That looks beautiful for portraits, but it ruins catalog photography. If you shoot a shoe at f/2.8, the toe might be sharp, but the heel will be entirely blurred out.
F-stop product photography requires a narrow opening to keep the entire item crisp. You want an aperture between f/8 and f/11. This ensures that both the front label and the back edge of the bottle are razor sharp.
Here is the trade-off. Shooting at f/11 requires an enormous amount of light to hit the sensor. If you do not have powerful studio strobes, your image will turn out completely black. You have to compensate for that narrow opening by leaving the shutter open longer.
Shutter speed and the tripod dependency
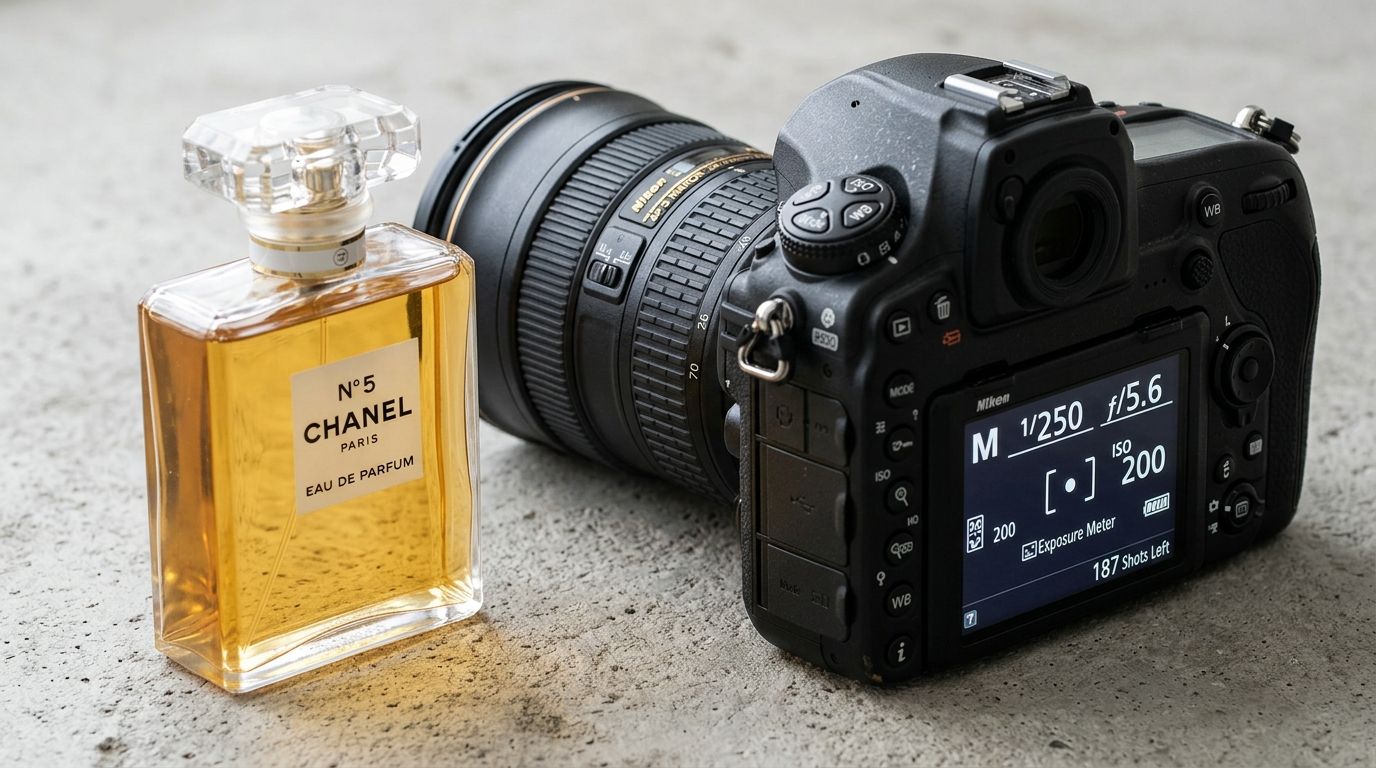
Shutter speed is simply how long the camera sensor is exposed to light. Since your ISO is locked at 100 and your aperture is locked at f/8, shutter speed becomes the only variable left to balance the exposure.
If you are holding the camera in your hands, a slow shutter speed will capture the tiny, natural tremors in your muscles. The result is a blurry photo. You cannot handhold a camera slower than 1/100th of a second and expect professional sharpness.
This is why an essential product photography setup is built entirely around a heavy tripod. Once the camera is locked onto a tripod, camera shake goes away. You can drop your shutter speed to half a second or even a full second if you are using cheap continuous lights. The stationary product will not move, the camera will not move, and the resulting image will be perfectly exposed and brutally sharp.
The 6 Scenario Cheat Sheet
Theory only gets you so far. When you are standing in a studio with a shot list of fifty SKUs, you need exact starting points. Every light setup is slightly different, but plugging these settings into manual mode will get you ninety percent of the way there immediately.
| Scenario | Aperture | ISO |
|---|---|---|
| White Background | f/8 - f/11 | 100 |
| Lifestyle Shot | f/4 - f/5.6 | 200 - 400 |
| Macro Detail | f/16 | 100 |
1. White Background Studio
This is the undisputed standard for Amazon and Shopify catalog pages. Your goal is maximum clarity. When photographing products on a white background, the background must be bright enough to vanish, but not so bright that it washes out the edges of your product.
Settings: ISO 100. Aperture f/8 or f/11. Shutter speed 1/160s (if using studio flash) or 1/10s (if using continuous LED panels on a tripod).
2. Colored Background
Shooting on seamless colored paper requires careful attention to color accuracy. If your exposure is too bright, a rich navy blue background will render as a washed-out pastel. You need to protect the saturation.
Settings: ISO 100. Aperture f/8. Shutter speed will depend on your lights, but aim to underexpose slightly in-camera. It is always easier to bring up shadows in post-production than to recover lost color saturation from an overexposed background.
3. Lifestyle and Context
Showing a product in its natural environment changes the rules. You rarely want everything in the room perfectly sharp. You want the viewer's eye drawn strictly to the product. Using natural light in product photography is common for these shots.
Settings: ISO 200 to 400 (natural light fluctuates). Aperture f/4 to f/5.6. This lower f-stop throws the background out of focus while keeping the product clear. Shutter speed should be 1/125s or faster if you are holding the camera by hand.
4. Flat Lay
Top-down flat lays are deceptively difficult. The lens is pointing straight down at a table covered in props of varying heights. A bottle of perfume stands three inches tall. The ribbon next to it is flat against the table. The distance from the lens to the top of the bottle is significantly shorter than the distance to the table.
Settings: ISO 100. Aperture f/11. You need a deep focal plane to keep the tall objects and the flat objects sharp at the same time. Shutter speed will likely need to drop to 1/15s, making a tripod extension arm mandatory.
5. Close-up Details (Macro)
When you push a macro lens inches away from a jewelry clasp or the texture of a serum, physics works against you. The closer the lens gets to the subject, the shallower the depth of field becomes. Even at f/8, only a millimeter of the product will be sharp.
Settings: ISO 100. Aperture f/16. To get that much light through such a tiny opening, your strobe lights must be turned up to maximum power. Many photographers end up shooting multiple images at f/8 and blending them together in Photoshop, a process called focus stacking.
6. Transparent Products
Glassware, acrylic, and clear liquids reflect everything in the room, including you. The camera settings are identical to the white background scenario, but the challenge is entirely environmental.
Settings: ISO 100. Aperture f/8. Shutter speed 1/160s. The secret here is not the camera dial. It is flagging off the light. You must use black boards around the product to create defined, attractive dark edges on the glass, otherwise the transparent object will disappear into the background.
White Balance and File Formats
Focus and exposure are only two parts of the equation. Getting the color right is where most beginners ruin their catalogs. Customers buy based on the specific shade of a product. If a customer orders a sage green shirt and receives a forest green shirt, that product is getting returned.
Kelvin white balance over Auto
Do not rely on Auto White Balance. AWB allows the camera to analyze the scene and guess the color temperature. If you introduce a brightly colored prop into the frame, the camera will automatically shift the white balance to compensate. Suddenly, the background that looked pure white in the last photo looks slightly yellow in the next.
Take control by using Kelvin white balance. Light has a temperature. Studio strobes are usually balanced to mimic daylight, around 5500K. By manually locking your camera to 5500K, you force the camera to interpret colors the exact same way for every single shot. Consistency across a category page builds trust.
RAW format product photography
Set your camera to shoot RAW files, not JPEGs. A JPEG is a compressed file. The camera takes the image data, bakes in a bunch of contrast and color choices, and throws away the rest of the information to save memory card space. If you accidentally underexpose a JPEG, bringing the brightness up in post-production will destroy the image quality.
A RAW file is a massive, uncompressed packet of data straight from the sensor. It looks dull straight out of the camera, but it holds incredible detail in the shadows and the highlights. If your white balance was slightly off during the shoot, a RAW file allows you to fix it in Lightroom with one click, without any loss of quality.
Frequently Asked Questions
What ISO should I use for product photography?
Stick to the lowest native ISO your camera allows, usually ISO 100 or 200. This choice guarantees the cleanest image quality while preventing unwanted digital noise from degrading your product details. Always keep your sensor settings as low as possible to maintain a professional standard for your catalog images.
What aperture is best for product photography?
Target an aperture between f/8 and f/11 for most standard catalog photography. This specific range creates a deep enough focal plane to keep your entire product in sharp focus from the front to the back. Use lower f-stop values only when you need to intentionally blur a background for lifestyle photography.
Should I shoot product photos in RAW or JPEG?
Always shoot in RAW format to capture the full range of uncompressed data from your camera sensor. This file type grants you the ability to adjust exposure, recover shadows, and fix white balance errors during post-production. You retain significantly more detail by avoiding the compression that happens when saving images as JPEGs.
What white balance setting for product photography?
Manual Kelvin settings are superior to any auto mode for maintaining consistent product color across a full catalog. Setting your camera to 5500K provides a precise match for daylight-balanced lighting sources. You prevent color shifting by avoiding automatic analysis that gets confused by the specific props or colors within your frame.
Why do my product photos come out blurry?
Blurry photos typically result from slow shutter speeds, improper focus points, or overly wide apertures. A sturdy tripod fixes the camera shake that occurs when using slower shutter speeds required for studio lighting. Double-check that your focus point is manually locked onto the most important part of the product to ensure total clarity.
Key Takeaways
- Keep your ISO locked at 100 to eliminate digital grain and preserve product texture.
- Use an aperture of f/8 or f/11 to ensure the entire product remains in sharp focus.
- A heavy tripod is mandatory for compensating with slower shutter speeds.
- Shoot exclusively in RAW format and lock your white balance to a specific Kelvin temperature for catalog consistency.
Streamline your product photography workflow
If you are tired of adjusting manual settings for every single product, consider automating the process. CherryShot AI allows you to generate professional images from simple references, saving hours of manual labor in the studio.
Try CherryShot AI