How to Photograph Jewelry at Home: Studio-Quality Results Without a Studio
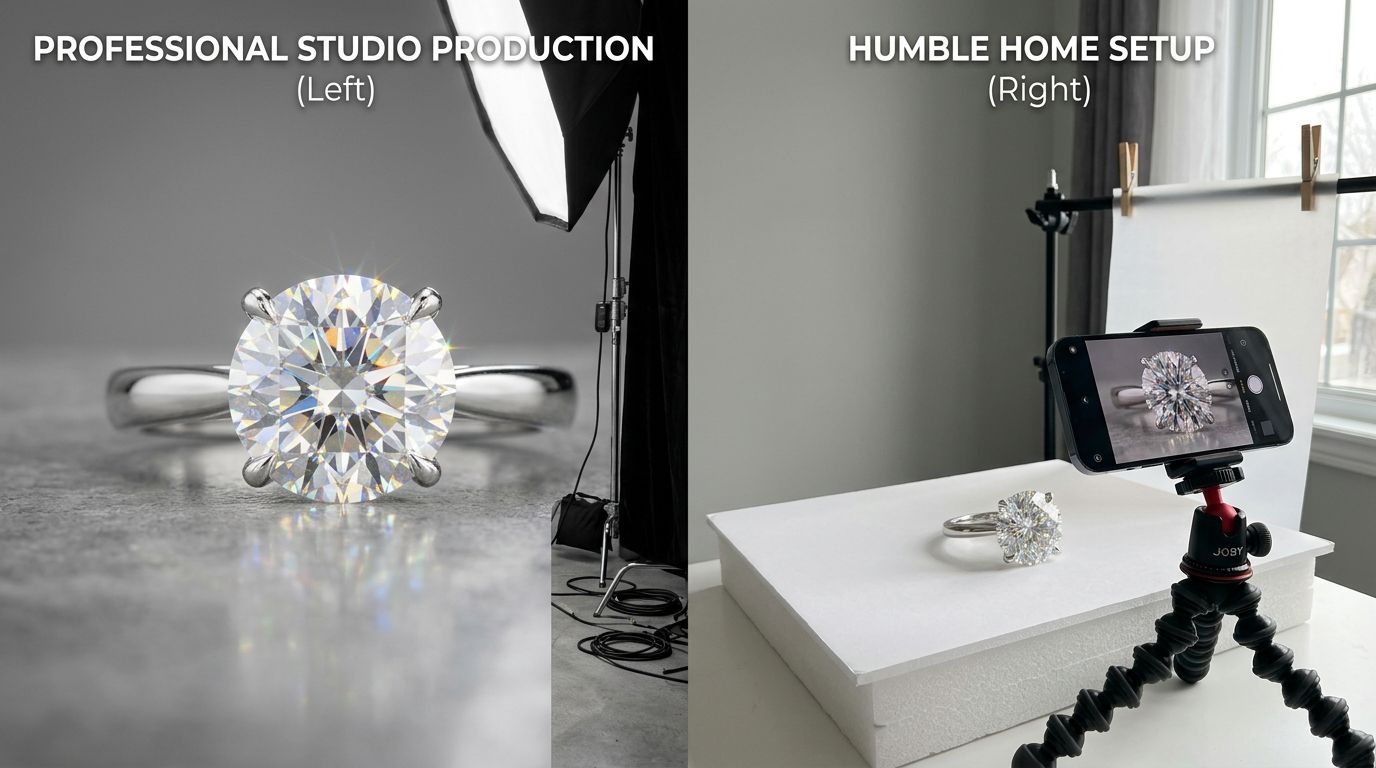
You can photograph jewelry at home using a single continuous light, a piece of white acrylic, and a macro lens. The secret to capturing polished metal and gemstones is not buying expensive strobes. The secret is mastering diffusion. You are not lighting the jewelry itself. You are lighting the environment that reflects onto the surface of the jewelry. Control those reflections, and you control the final image.
Definition
Jewelry photography is a specialized technique focused on managing light reflections to clearly showcase the texture of metal and the clarity of gemstones. It relies on macro optics to capture small objects at high magnification, requiring stable environments and controlled lighting to ensure color accuracy and consistent catalog presentation.
Most tutorials on how to photograph jewelry at home are written by hobbyists. They talk about moody shadows, artistic blur, and hunting for perfect sunlight next to a living room window. If you run a jewelry brand, you do not want moody shadows. You need absolute clarity, color accuracy, and catalog consistency.
Building a DIY jewelry photography setup is a temporary fix. It is a bridge you build until you can afford to automate the process. If you have fewer than twenty SKUs, building a small tabletop studio makes sense. Once you cross that twenty SKU threshold, manual photography becomes a logistics bottleneck that will actively stall your product launches.
A minimalist tabletop setup requires absolute control over ambient light. The camera must remain completely locked down.
The physics of photographing shiny objects
Metal acts like a funhouse mirror. When you point a bare bulb at a gold ring, the camera does not see a beautifully lit piece of gold. It sees a sharp, blown-out reflection of the bulb itself, surrounded by dark patches reflecting the rest of your room.
| Method | Pros | Cons |
|---|---|---|
| DIY Setup | Low cost, total control | Time-intensive, steep learning curve |
| Lightbox | Inexpensive, compact | Poor reflection control, uneven light |
| AI Generation | Fast, consistent, scalable | Requires initial base images |
To fix this, you must build a white tent around the product. This is why lightboxes are so popular in jewelry photography. A lightbox surrounds the item with white fabric. When you fire a light through that fabric, the light scatters. The ring reflects the glowing white wall instead of the bulb. The result is a smooth, continuous gradient of light across the metal.
However, relying solely on cheap, all-in-one Amazon lightboxes will cap your quality. Those boxes usually feature rigid LED strips glued to the ceiling. Those individual LED diodes will reflect directly onto the top curve of your rings and pendants, creating dozens of tiny white dots on the metal. This screams amateur photography.
You need an independent continuous light source and a separate roll of diffusion paper. Place the jewelry on a table. Hang the diffusion paper between the light and the jewelry. Move the light further away from the paper to soften the shadows. This approach takes more space, but learning these specific tips for fine detail without a studio is what separates premium brands from drop-shippers.
Camera settings that matter for fine jewelry
Your iPhone is incredible for behind-the-scenes Instagram stories. It is terrible for jewelry catalog pages. Smartphone lenses apply aggressive digital sharpening to make up for their tiny sensors. When you zoom in on a diamond shot with an iPhone, it looks like a watercolor painting.
Why you need a macro lens
You must use a proper mirrorless or DSLR camera paired with a dedicated macro lens. A standard 50mm lens forces you to stand two feet away from the subject just to pull focus. By the time you crop the image down to show the ring, you have thrown away 80 percent of your pixels.
A true 100mm macro lens lets you get inches away from the piece. The jewelry fills the entire frame. Every facet of the gemstone remains razor sharp.
Managing depth of field
When you shoot extremely close to an object, your depth of field shrinks dramatically. If you focus on the front prong of a diamond ring using an f/2.8 aperture, the back half of the ring will blur into oblivion. To keep the entire piece sharp, you must stop your lens down to f/11 or f/14.
Shooting at f/14 restricts the amount of light hitting your sensor. To compensate without introducing grainy noise (keep your ISO at 100), you have to slow down your shutter speed. This mandates a heavy, stable tripod. You cannot hold a camera by hand at a half-second shutter speed and expect sharp jewelry photos.
Professional studios use a technique called focus stacking, where they take fifteen different photos at various focal points and merge them in software. This produces perfect edge-to-edge sharpness. It also triples post-production time and is notoriously frustrating for beginners to master.
Styling tools for rings, earrings, and necklaces
Photographing jewelry requires specialized mounting tricks. Rings do not stand upright on their own. Necklaces refuse to lay perfectly round. If you want to know how to photograph rings professionally, you have to buy dental wax or specialized mounting putty.
Take a tiny speck of wax, roll it into a ball, and stick it to the bottom of the ring band. Press the ring down onto your white acrylic background. The wax holds the ring perfectly vertical. In post-production, you simply use a healing brush to clone out the wax.
For earring photography, standing items upright is trickier. Many brands shoot earrings flat on a textured surface. If you need a hanging shot, you can build a small frame out of acrylic rods and use clear fishing line to suspend the piece. The downside to fishing line is that it catches the light and must be meticulously erased in editing.
When determining how to light these varied setups, do not rely on a window. While finding the perfect window is a great way to using natural light for products like apparel or cosmetics, the sun changes position every five minutes. If your shoot takes three hours, the color temperature of your first ring will look completely different from the color temperature of your last pendant. Stick to consistent, artificial continuous light.
The math: When DIY photography breaks your brand
Let us look at the actual time commitment of photographing jewelry at home. A standard ecommerce page requires five angles per product: a hero shot, an alternate angle, a detail shot of the clasp or setting, a flatlay, and a lifestyle rendering showing scale.
If you are launching a new collection with 20 pieces, that is 100 finished images.
A fast amateur can style, light, shoot, and retouch a single jewelry image in fifteen minutes. Doing the math, 100 images will take you 25 straight hours of uninterrupted work. That is over three full workdays lost to photography just to launch 20 SKUs. Most founders drastically underestimate this burden when deciding to take good photos without a pro.
I will admit a genuine trade-off here. Doing it yourself guarantees you total control over the exact angle of the stone. If you have the patience, the manual method works perfectly. But founders are rarely blessed with patience or free time.
This is where the AI breakeven point hits. When you automate the process, the friction disappears. You upload a basic, well-lit snapshot of your jewelry. You select a visual mode. CherryShot AI maps the reflections, builds the environment, and generates campaign-ready photos in minutes.
The cost drops to under $5 per finished image. More importantly, the turnaround time drops from a grueling three-day weekend in your living room to a single afternoon at your desk. You stop worrying about dust on the macro lens and start focusing on moving inventory.
Audit your product images before your next campaign
Review your existing catalog to identify inconsistencies in lighting and focus. If you find gaps where images don't match or look dated, try CherryShot AI to regenerate those files for a uniform, professional look across your site.
Try CherryShot AIKey Takeaways
- Always diffuse your light sources to prevent harsh reflections on polished metal.
- Use a dedicated macro lens and narrow aperture (f/11) to keep the entire piece sharp.
- Secure rings upright using mounting putty or dental wax on a rigid acrylic background.
- Brands with more than 20 SKUs should pivot from manual DIY photography to AI generation to prevent launch delays.
Frequently Asked Questions
What camera settings work best for jewelry photography?
Narrow apertures like f/8 or f/14 keep the entire piece in focus. High quality requires low ISO settings, ideally 100 or 200, to ensure your images stay free of digital noise. Combine these settings with a tripod and a two-second shutter delay to eliminate vibration. Slow shutter speeds compensate for the limited light entering your lens at smaller apertures. Consistent manual settings prevent your final files from varying between product angles.
How do I avoid glare on shiny jewelry?
Diffusing the light source prevents harsh, blown-out spots on polished metal surfaces. Place frosted acrylic or diffusion paper between your light source and the jewelry to soften incoming photons. Blocking unwanted environmental reflections is equally important for a clean look. Foam boards positioned just outside the camera frame prevent dark room shadows from appearing on the metal. These steps create a uniform, professional glow across your entire piece of jewelry.
What's the best background for jewelry product photos?
Pure white acrylic remains the industry standard for clean, professional ecommerce catalog pages. Rigid surfaces like acrylic provide a subtle, natural reflection that grounds the piece effectively. For lifestyle imagery, textured materials like marble tiles or neutral linen fabric add depth. Avoid using complex patterns or deeply saturated background colors that steal attention from your jewelry. A minimalist backdrop ensures the customer focuses solely on your product details and material quality.
Do I need a macro lens for jewelry photography?
Macro lenses are essential because standard optics cannot focus closely enough to fill the frame with small items. Using a standard 50mm lens forces you to crop the image significantly, which destroys pixel resolution and clarity. A dedicated 100mm macro lens allows for 1:1 magnification to capture fine details like gemstone facets. High-resolution results demand the precise optics found only in specialized macro glass for your professional product pages.
Is a lightbox good for jewelry photography?
Lightboxes often create unappealing, dotted reflections on metallic surfaces due to cheap, built-in LED strips. Professional results come from building an open-sided studio setup using large sheets of white foam board and external continuous lighting. This method allows you to position light sources precisely to control highlights and eliminate glare. You gain total creative command over the reflections without the limitations imposed by rigid, prefabricated cube designs common in consumer photography kits.
Shooting your own jewelry at home is a necessary rite of passage for early-stage brands. You learn exactly how light interacts with metal, which trains your eye for quality. But as your catalog grows, your time becomes too valuable to spend wiping dust off acrylic risers. When you are ready to scale production without the studio overhead, CherryShot AI handles the heavy lifting in minutes.