Photoshop for Product Photography: Essential Edits and AI Shortcuts
Photoshop product photography is the hidden tax on every ecommerce catalog launch. You hire a photographer, they shoot your entire seasonal lineup, and then the real waiting begins. Routine editing tasks like background removal, color correction, and shadow drops eat up hours of manual post-production time. Today, the choice is no longer about mastering the clone stamp. It is about knowing which edits require human touch and which belong to automation.
Definition
Photoshop product photography is the process of manually editing raw commercial images to meet digital storefront standards. This workflow includes removing backgrounds, correcting colors, fixing surface blemishes, and adding realistic shadows to prepare items for consumer viewing.
Any brand still paying a retoucher by the hour to manually trace clipping paths is bleeding margin. The gap between a raw camera file and a web-ready image used to require a deep understanding of layer masks and healing brushes. Now, the bottleneck has shifted from human skill to software efficiency.
Before we completely rewrite the workflow, we have to understand exactly what we are replacing. A raw image straight out of the camera is never ready for a product page. It requires a rigid sequence of adjustments to look professional. Understanding this sequence is the key to automating it.
The gap between raw files and campaign-ready assets is measured in hours of post-production.
The 8 Essential Photoshop Edits for Ecommerce Photos
If you hand a folder of raw files to an experienced retoucher, they will run through the same checklist for every single image. These are the mandatory steps that turn flat, flawed photographs into the crisp visuals consumers expect.
1. Background removal and clipping paths
This is the most tedious task in all of ecommerce photography. You cannot just use the Magic Wand tool. It leaves a jagged, pixelated halo around your product. A professional retoucher zooms in to 300 percent and manually traces the outline of the product using the Pen tool. They place anchor points millimeter by millimeter to create a perfect vector path. For a simple box, this takes thirty seconds. For a handbag with chain straps or a bicycle with wire spokes, a single clipping path can take twenty minutes.
AI completely eliminates this manual trace. Modern algorithms instantly detect the subject and mask the background with pixel-perfect accuracy. Creating clean white backgrounds used to be an expensive studio requirement. Now it is a single click on an uploaded image.
2. Blemish removal and spot healing
No matter how carefully a stylist preps a product, high-resolution cameras capture every flaw. Dust settles on black plastic. Stray threads hang off sleeves. Scuff marks appear on leather. In Photoshop, fixing this requires selecting the Healing Brush or the Clone Stamp tool. The retoucher samples a clean area of pixels and paints over the dust or lint. They do this repeatedly across the entire surface of the product.
Automation handles this through generative clean-up. While heavy physical damage still requires manual patching, AI tools automatically smooth surfaces and eliminate minor sensor dust and lint without blurring the underlying texture.
3. Color correction and white balance
Camera sensors rarely capture colors exactly as the human eye sees them. Studio strobes often cast a slight blue or yellow tint over the scene. A red sweater might look orange on the monitor. To fix this, retouchers use Hue/Saturation adjustment layers and precise manipulation of the RGB curves. Getting the color wrong is the leading cause of product returns, making this a high-stakes edit.
AI workflows map the color profile of the original uploaded image directly onto the generated output. The technology analyzes the exact hex codes of your product and ensures the final render retains those specific values, regardless of the new environment it generates.
4. Adding drop shadows and reflections
When you strip away the original background, the product instantly looks like it is floating in empty space. It loses all weight and physical presence. To fix this, retouchers must manually paint in shadows underneath the item. They create a black shape, blur the edges with a Gaussian blur, and fade the opacity. It takes an incredible amount of skill to make an artificial shadow look natural.
When you upload an image to CherryShot AI, the system does not just paste your product onto a flat background. It physically simulates lighting in the new scene. The resulting drop shadows and reflections are optically accurate to the shape of your product.
5. Dodge and burn for depth
Flat lighting makes products look dull. Dodge and burn is a classic darkroom technique adapted for digital screens. The retoucher uses the Dodge tool to paint over highlights, making them brighter. They use the Burn tool to paint over crevices, making the shadows deeper. This local contrast adjustment gives a two-dimensional photo a three-dimensional pop.
AI product photography bakes this process into the generation phase. By selecting modes like Loud Luxury or Avant Garde, the system automatically applies dramatic lighting ratios that naturally enhance the highlights and lowlights of the item.
6. Ghost mannequin effects
Apparel brands want their clothing to look full and voluminous, but they do not always want a human model distracting from the piece. The solution is shooting the garment on a plastic mannequin, and then taking a second shot of the inside neck label. The retoucher then composites these two images together, erasing the mannequin and pasting the neck label in its place. Achieving the ghost mannequin effect manually is a slow, multi-layer process.
AI handles garment composites by recognizing the structure of the clothing. While traditional compositing takes distinct raw files, automated workflows are getting better at mapping flat apparel directly onto invisible, generated forms.
7. Perspective warping and straightening
Lenses distort reality. If you shoot a rectangular box with a wide-angle lens, the sides will bow outward. If you shoot from slightly above, vertical lines will converge at the bottom. Retouchers fix this using the Free Transform and Perspective Warp tools in Photoshop. They pull the corners of the image until the lines are perfectly parallel and mathematically straight.
Generative AI understands spatial geometry. When it places your product into a lifestyle scene, it aligns the perspective of the generated environment to match the angle of your original photograph, eliminating the jarring mismatch of poorly composited images.
8. Image resizing and web optimization
A master Photoshop file with ten adjustment layers can easily exceed two gigabytes. You cannot upload that to a Shopify store. The final step of the manual workflow is flattening the layers, resizing the image to standard dimensions, and compressing the file into a web-friendly format like WebP or JPEG. Doing this manually for hundreds of images requires building custom Action scripts.
Modern AI tools output campaign-ready files instantly. The moment the generation finishes, the image is already sized, compressed, and formatted for digital storefronts.
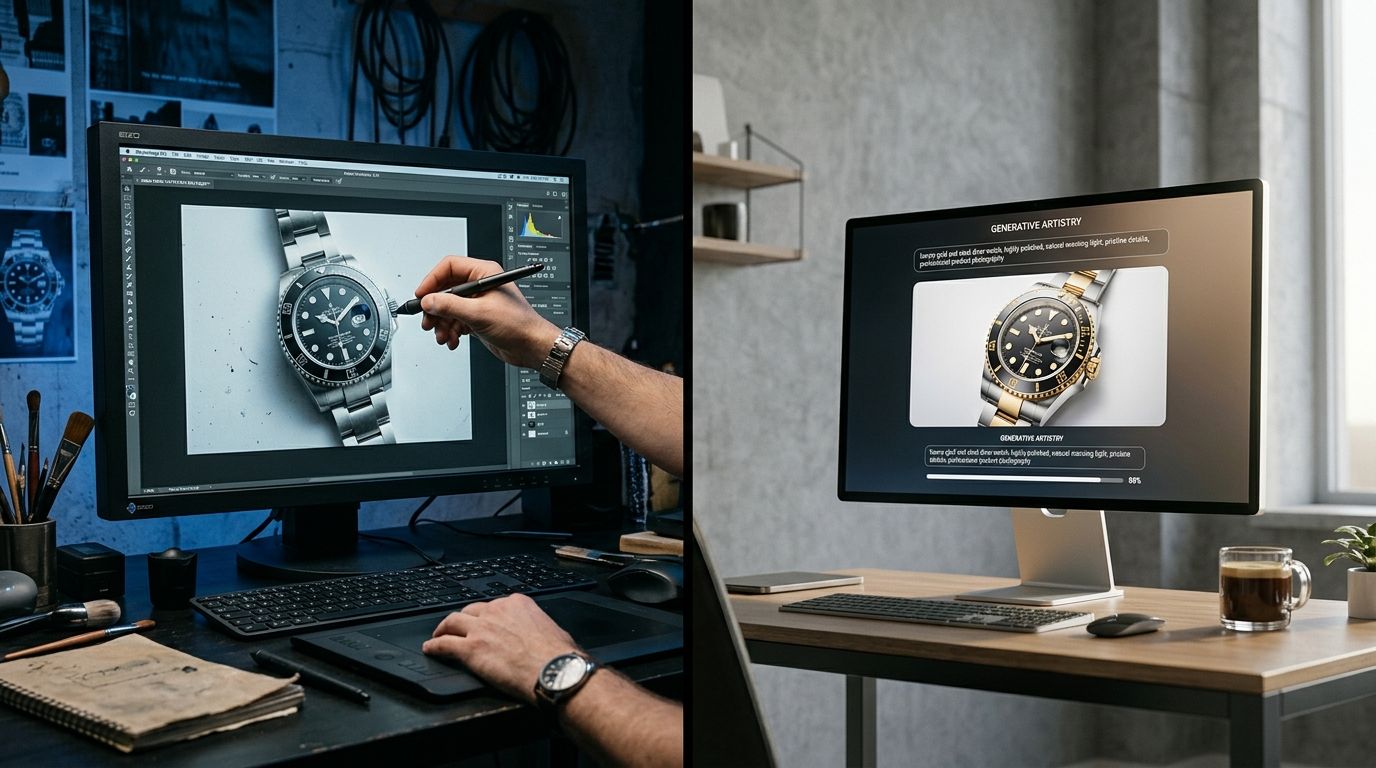
The Shift: AI vs Photoshop Product Photography
For two decades, product photography photoshop editing was the only way to get professional results. You had to endure the cost of a freelance retoucher or hire an in-house expert. That dependency created a massive bottleneck for fast-moving brands. When you launch a new colorway, you do not want to wait three weeks for a photographer to book a studio and a retoucher to clear their schedule.
| Post-Production Task | Manual Photoshop Workflow | Automated AI Workflow |
|---|---|---|
| Background Removal | Manually traced over minutes using the Pen tool | Detected and masked instantly via software |
| Shadow Creation | Hand-painted using blurred black shape layers | Optically simulated based on product geometry |
| Image Compression | Requires building custom batch Action scripts | Sized and formatted instantly upon generation |
AI product photography changes the math completely. Instead of tweaking individual pixels, you define the creative vision. Upload a standard product image, select a visual mode, and CherryShot AI generates the fully lit, properly shadowed, lifestyle-ready image in minutes. The per-image cost drops from eighty dollars to under five dollars. The turnaround goes from weeks to an afternoon.
AI is not flawless when you need absolute pixel-perfect color matching on a highly textured custom-dyed fabric. A human retoucher is still required to guarantee the hex code matches the thread perfectly under microscopic scrutiny. However, for the vast majority of catalog volume and lifestyle social media content, the minor trade-offs in ultimate granular control are heavily outweighed by the massive gains in speed and cost reduction.
(Worth noting: relying entirely on raw camera files without any post-processing is a luxury only heritage brands shooting exclusively on film can afford, and even they scan and adjust the black levels digitally.)
Reclaiming Your Post-Production Workflow
The brands scaling the fastest right now have fundamentally changed how they view post-production. They no longer accept the slow churn of manual clipping paths and drop shadow painting. If you calculate the true cost of photo retouching, the math rarely favors manual labor for standard catalog shots.
This is where smart integration happens. Understanding when AI product photography makes sense is the difference between missing a launch deadline and having assets ready on demand. You keep your specialized retouchers focused on hero imagery for billboards and high-end editorial campaigns. For the endless volume of product page assets, social media posts, and email marketing banners, you automate.
By moving the repetitive tasks off the plate of human designers, you allow your creative team to focus on actual strategy rather than tedious execution. The tools exist. The technology is proven. The only thing left is letting go of the Pen tool.
Frequently Asked Questions
How do I edit product photos in Photoshop?
Editing product photos in Photoshop requires importing raw camera files to adjust exposure and correct the white balance. Isolating the item from its original background involves drawing precise masks with the Pen tool. You must then use the healing brush to erase dust and surface imperfections before generating a realistic drop shadow to ground the object and exporting it in a web-optimized format.
What Photoshop edits do product photos need?
Standard e-commerce images require mandatory background removal, blemish healing, precise color correction, and realistic shadow generation. Additional dodge and burn adjustments dramatically enhance visual depth, while apparel specifically needs complex ghost mannequin compositing to accurately display the inner collar structure. Retouchers also perform perspective straightening to fix any optical shape distortion caused by the specific camera angle used during the initial studio shoot.
Can AI replace Photoshop for product photography?
Artificial intelligence completely replaces manual Photoshop workflows for repetitive catalog tasks like background removal, shadow generation, and environmental relighting. Specialized product photography platforms maintain the exact shape and branding of your item while accurately generating an entirely new scene around it. While manual software remains necessary for highly specific micro-retouching on intricate materials, automated systems now handle the bulk of standard e-commerce image production.
How long does Photoshop editing take for product photos?
An experienced retoucher takes between five and fifteen minutes to fully edit a single e-commerce product photo. Complex items featuring transparent materials or intricate edges, such as bicycles and fine jewelry, frequently require up to thirty minutes of manual work per image. Processing an entire catalog of hundreds of SKUs through this tedious post-production pipeline often delays new product launches by several weeks.
What is the best Photoshop workflow for ecommerce product photos?
The most efficient manual workflow relies on strict batch processing to handle repetitive actions across multiple files. Editors begin by importing all raw images to apply a uniform color profile before manually clipping out backgrounds and removing blemishes layer by layer. Saving custom drop shadows as reusable layer styles allows you to run an automated Action script that resizes and compresses all open files simultaneously.
Key Takeaways
- Manual background removal and shadow painting consume hours of costly post-production time.
- AI product photography tools completely replace the need for repetitive clipping paths and spot healing.
- Human retouchers are still valuable for highly specific color matching on complex textiles.
- Brands launching high volumes of SKUs save weeks of delay by automating their catalog edits.
Stop paying for hours of manual tracing when technology can do it in seconds. Upload your raw images to CherryShot AI and get campaign-ready lifestyle photos before your photographer even sends their final invoice.
Stop manually tracing clipping paths
Reclaim your post-production hours by automating routine edits. Upload your raw product shots and generate web-ready catalog assets with perfectly accurate lighting in seconds.
Try CherryShot AI